A/C Not Cooling? Why Check Your Low Side Quick Coupler First?
Your car's A/C is blowing warm air, and you're dreading a costly repair. Jumping to conclusions about compressors or condensers can waste hours and lead to expensive misdiagnoses.
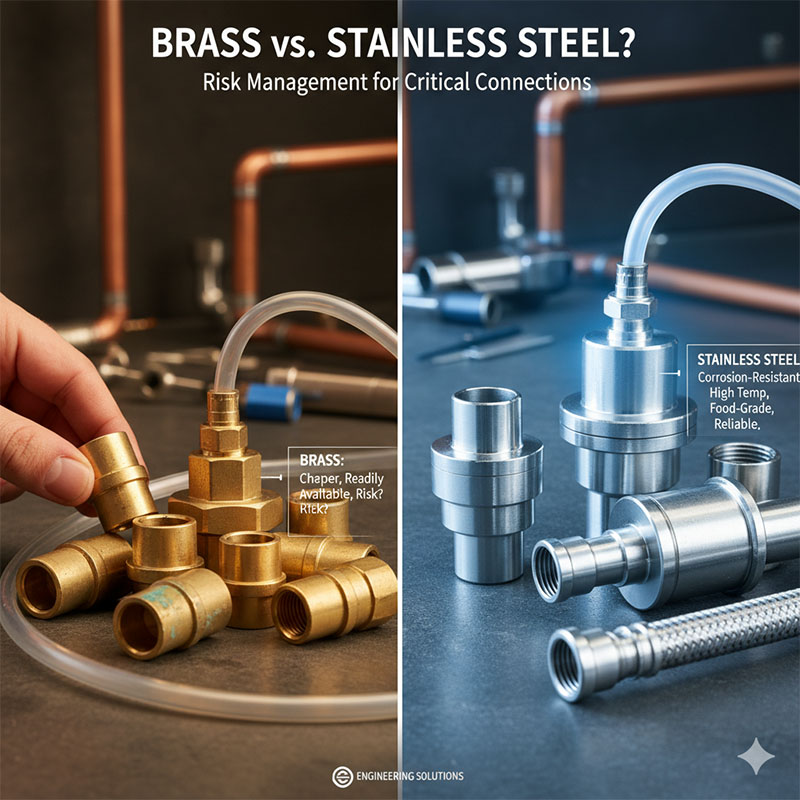
Always check the low side quick coupler first because it's the primary point of failure for both diagnostics and charging. A worn seal, a bad connection, or a faulty valve depressor at this single point can mimic symptoms of a much larger system failure.
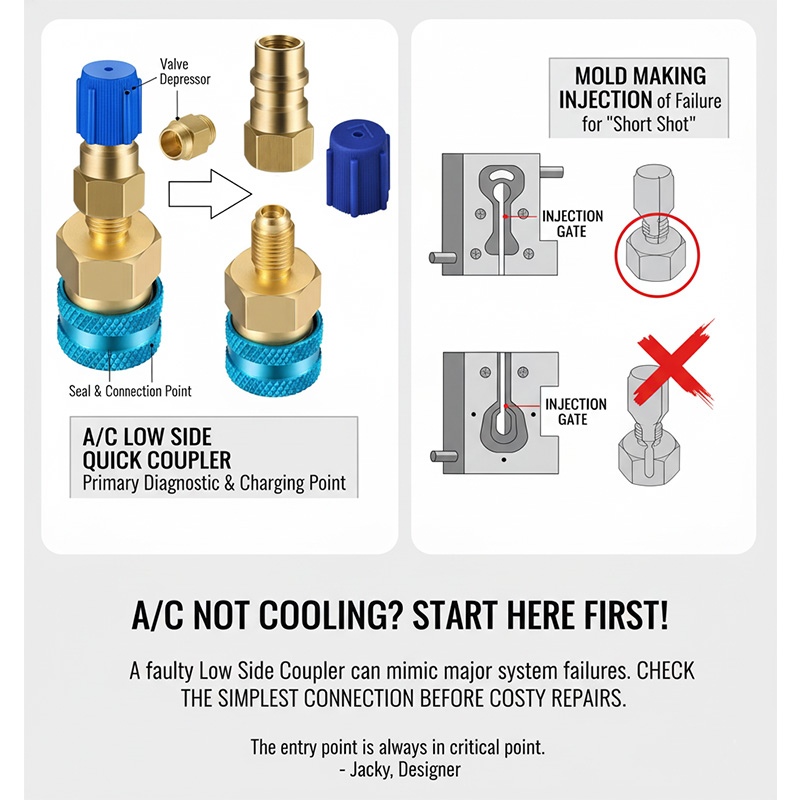
This principle of checking the most basic point of failure first is something I live by. In mold making, if a part comes out short-shot (not fully formed), we don't immediately re-tool the whole cavity. First, we check the injection gate. Is it clogged? Is it too small? The gate is the entry point for the plastic, just as the low side coupler is the entry point for diagnosing and charging refrigerant. As a designer, Jacky, you know that the simplest connection point is often the most critical. You must confirm it's working perfectly before you can trust any other data from the system.
How does a faulty quick coupler prevent cooling?
Wondering how one small part can shut down your entire A/C? It’s frustrating when a complex system is defeated by such a simple component.
A faulty coupler prevents cooling in two main ways. First, a leaky O-ring allows refrigerant to escape, leading to low system pressure. Second, a poor connection prevents accurate pressure readings, making it impossible to diagnose or properly recharge the system.
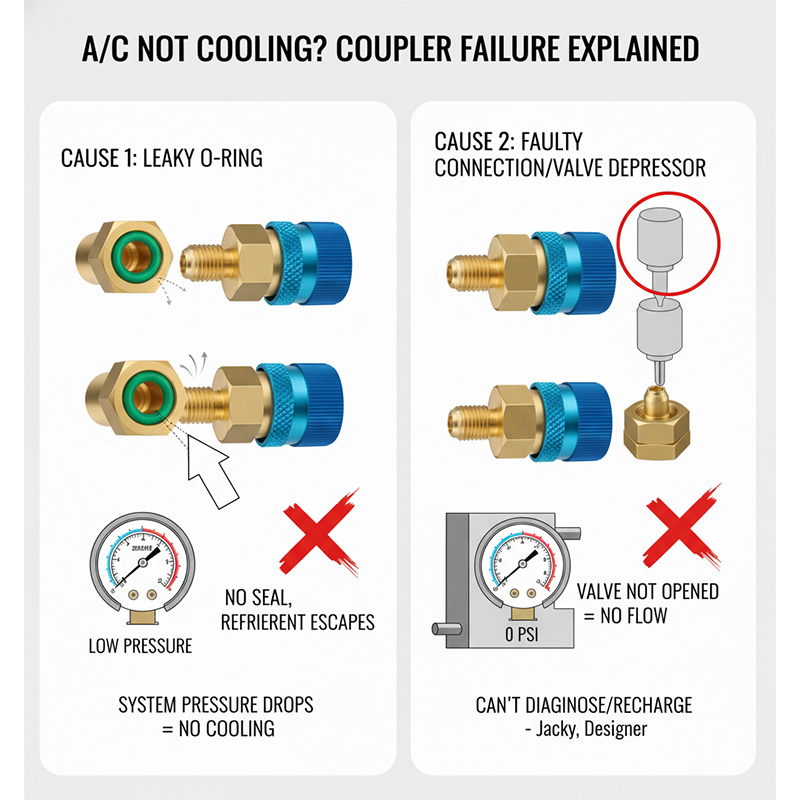
Let's break down the mechanics. The coupler has two jobs: create an airtight seal with the service port and depress the Schrader valve pin inside that port to open the system. If the internal O-ring is old and brittle, it can't create that seal, and the refrigerant leaks out. This is a common issue and a primary cause of non-cooling. The other failure is mechanical. The coupler has a pin that is supposed to push the port's valve open. If that mechanism is worn or the coupler isn't fully seated, the valve never opens. You get a false reading on your gauges (or no reading at all), and you can't add refrigerant. As a designer, Jacky, you'd recognize this as a critical interface failure. The entire diagnostic process depends on this one mechanical handshake working perfectly.
Failure Mode and System Consequence
| Coupler Fault | Cause | Result for A/C System |
|---|---|---|
| External Leak (Hissing Sound) | Worn or damaged internal O-ring. | Gradual or rapid loss of refrigerant, leading to no cooling. |
| No Gauge Reading (False Zero) | Coupler not fully seated or depressor is broken. | Schrader valve is not opened; system cannot be diagnosed or charged. |
| Inaccurate Low Pressure Reading | Partial seal or partial valve opening. | Incorrect diagnosis, leading to potential overcharging or undercharging. |
| Coupler Won't Lock On | Worn locking collar or incorrect coupler size. | Unsafe and insecure connection, cannot perform any service. |
What are the common failure points in the coupler’s design?
Thinking your coupler is a simple piece of metal? This overlooks the precision components inside that wear out over time, leading to connection failures right when you need it most.
The most common failure points are the internal O-ring seal, which dries out and cracks; the valve depressor pin, which can bend or wear down; and the spring-loaded locking collar, which can lose tension or become jammed with dirt.
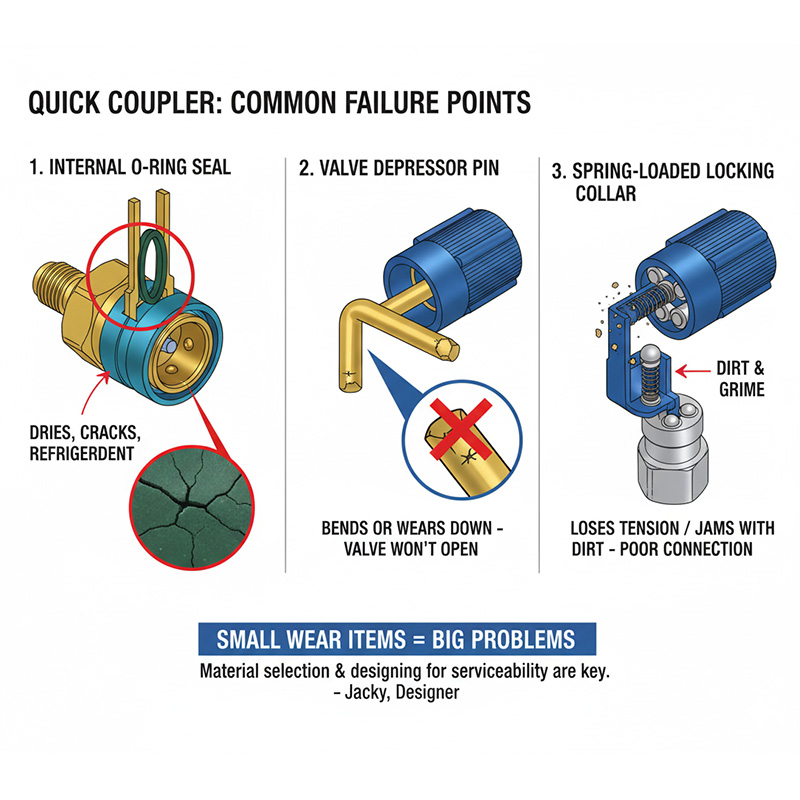
From a design perspective, a quick coupler is a fascinating little device built for repeated use under pressure. But every component has a lifespan. The O-ring is the hero here, made from HNBR to resist refrigerant and oil, but it's still a soft seal that gets compressed and decompressed constantly. The valve depressor needs to be strong enough to push a spring-loaded valve but can be damaged if the coupler is forced on at an angle. The outer locking collar uses a spring mechanism to hold ball bearings in place. Dirt and grime can work their way in there, preventing the bearings from seating properly. When I was sourcing components for my CNC trading company, I learned that the quality of these small "wear items" makes all the difference. For Jacky, this is a lesson in material selection and designing for serviceability.
How do you safely and properly connect a low side coupler?
Worried you might damage the port or get a face full of refrigerant? Improperly connecting a coupler is a common mistake that can be dangerous and lead to inaccurate readings.
To connect it safely, first ensure the vehicle's engine is off. Align the coupler with the low side port (it's the larger one), pull back the sleeve, press it firmly onto the port until you hear a "click," then release the sleeve to lock it. Never force it.
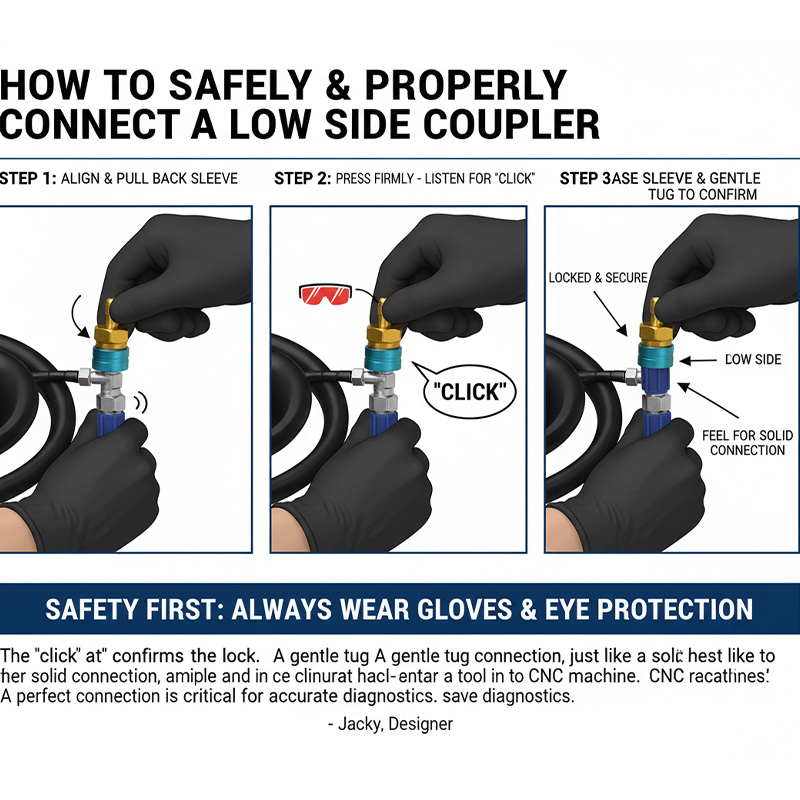
The process is designed to be straightforward, but technique matters. The "click" is your audible confirmation that the locking mechanism has engaged properly. If it doesn't click, don't proceed. Take it off and check for obstructions like dirt in the sleeve or a damaged port cap. One pro tip is to give it a gentle tug after it's connected. It should feel solid and secure. If it feels wobbly, disconnect and try again. Also, always wear gloves and safety glasses. Even a tiny puff of refrigerant can cause freeze burns or eye injury. This process is similar to loading a tool into a CNC machine spindle. You have to ensure it is seated perfectly and locked in place. A poorly seated tool, like a poorly seated coupler, will cause major problems as soon as the system is under pressure.
What are the signs of a bad coupler versus a bigger A/C problem?
Is your low pressure reading a sign of a bad leak or just a bad connection? Guessing wrong means you either replace a good part or miss the real problem entirely.
A bad coupler often gives specific clues: a hissing sound directly from the connection, a gauge needle that won't move at all, or a reading that fluctuates wildly as you wiggle the fitting. A true system leak will show a low pressure reading with a stable, secure connection.
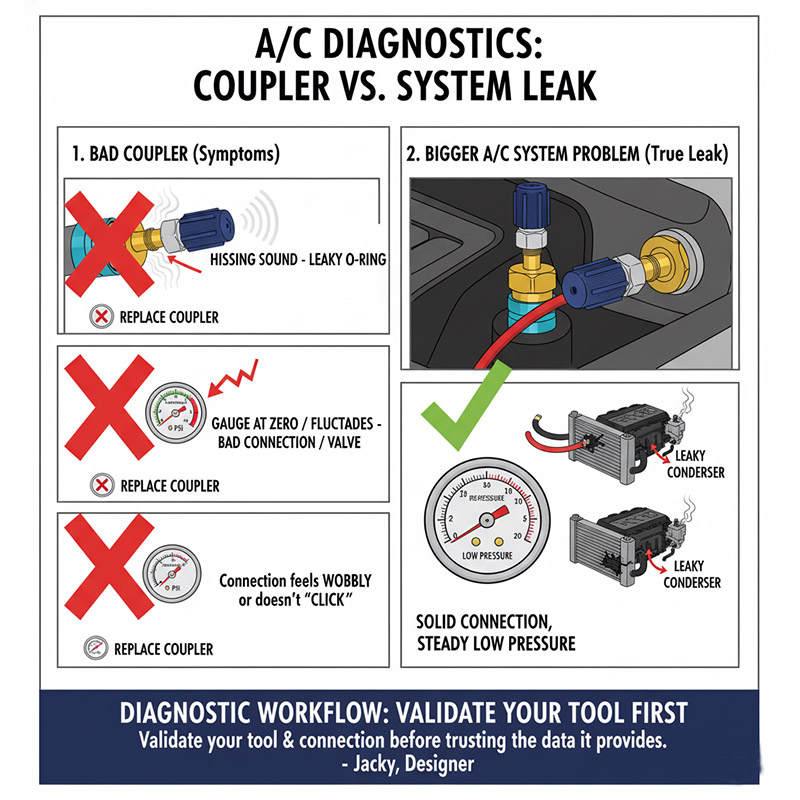
Here's my diagnostic workflow. First, connect the coupler. Do I hear a hiss? If yes, the coupler's O-ring is bad. That's my problem. If there's no hiss, I look at the gauge. Is it reading zero? I'll wiggle the fitting slightly. If the needle jumps, it's a bad connection. The coupler isn't depressing the valve correctly. But if the connection is solid and silent, and my gauge shows a steady, but low, pressure reading, then I can trust the tool. Now, my focus shifts to the A/C system itself. The low pressure reading is real, and it indicates a refrigerant leak somewhere else in the system, like a hose, condenser, or evaporator. This methodical approach, which you practice in design verification, Jacky, prevents you from chasing ghosts. You must validate your tool and connection before you can trust the data it provides.
Conclusion
Always start A/C diagnostics at the low side coupler. This simple, often overlooked connection point is a common source of leaks and false readings that can save you hours of troubleshooting.