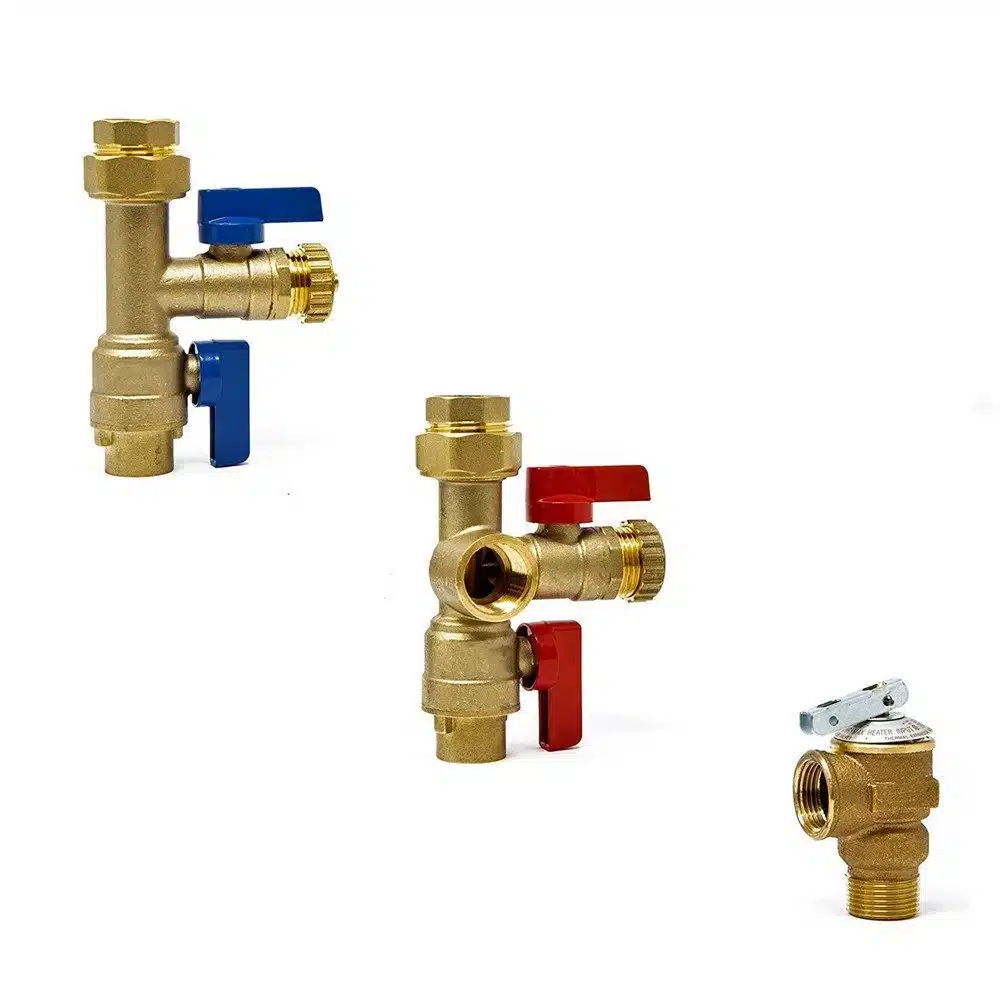
A Pressure Relief Valve (PRV), also known as a Temperature and Pressure Relief (TPR) Valve, is a critical safety component in water heaters. It prevents excessive pressure buildup that could lead to tank rupture or explosion. If your Pressure Relief Valve is leaking, stuck, or malfunctioning, it must be replaced immediately.
This guide will walk you through the process of replacing PRV on water heater, using the Fanovo FPV05-NPT Isolator Tankless Water Heater Valve Kit with Pressure Relief Valve as an example.
Tools & Materials Needed
Before starting, gather the following:
-
Adjustable wrench or pipe wrench
-
Teflon tape (plumber’s tape)
-
Bucket or towels (to catch water)
-
Screwdriver (if required for your model)
-
Replacement Pressure Relief Valve (ensure correct size & pressure rating)
For this example, we’re using the Fanovo FPV05-NPT Kit, which includes:
✔ Brass Pressure Relief Valve (150 PSI rated)
✔ Isolation ball valve for easy maintenance
✔ NPT threaded connections for secure fit
Step-by-Step: Replacing PRV on Water Heater
Step 1: Turn Off Power & Water Supply
-
Electric Water Heater: Switch off the circuit breaker.
Gas Water Heater: Turn the gas valve to “Pilot” or “Off.” -
Shut off the cold water supply valve leading to the heater.
-
Open a hot water faucet nearby to relieve pressure.
Step 2: Drain Excess Water (If Needed)
-
Attach a hose to the drain valve at the bottom of the tank (optional, but helpful if replacing other parts).
-
Let some water drain into a bucket or floor drain.
Step 3: Remove the Old Pressure Relief Valve
-
Place a bucket under the PRV to catch dripping water.
-
Use a wrench to loosen and unscrew the old valve (turn counterclockwise).
-
If stuck, apply penetrating oil and wait 10 minutes before trying again.
-
Step 4: Prepare the New Pressure Relief Valve
-
Clean the threads on the water heater where the valve attaches.
-
Wrap Teflon tape (3-5 layers) clockwise around the new PRV’s threads.
-
The Fanovo FPV05-NPT has brass threads, so tape ensures a tight seal.
-
Step 5: Install the New Pressure Relief Valve
-
Hand-tighten the new PRV into the opening (turn clockwise).
-
Use a wrench to secure it—tighten 1/2 to 3/4 turn more (do not overtighten).
-
If using the Fanovo isolation ball valve, install it between the tank and PRV for easier future maintenance.
Step 6: Restore Water & Power
-
Slowly turn the cold water supply back on.
-
Check for leaks around the new valve.
-
Close the hot water faucet you opened earlier.
-
Restore power (electric) or gas supply.
Step 7: Test the New Pressure Relief Valve
-
Once the tank is full and heated, lift the PRV test lever briefly.
-
Water should discharge from the overflow pipe, then stop when released.
-
If it continues leaking, the valve may be defective or not seated properly.
-
Maintenance Tips for Your PRV
✅ Test every 6 months by lifting the lever.
✅ If it leaks continuously, replace it immediately.
✅ Consider installing a water pressure gauge (ideal range: 50-80 PSI).
FAQ: Replacing PRV on Water Heater
Q: Is it normal for a Pressure Relief Valve to drip?
A: Occasional dripping is normal (during pressure release), but constant leaking means it needs replacement.
Q: Can I replace a PRV myself?
A: Yes, if you follow safety steps. If unsure, hire a licensed plumber.
Q: Why does the Fanovo FPV05-NPT include an isolation valve?
A: The ball valve allows PRV replacement without draining the tank, making maintenance easier.
Final Thoughts
Replacing a Pressure Relief Valve (PRV) is a simple but crucial task for water heater safety. The Fanovo FPV05-NPT Kit provides a durable brass PRV with an isolation valve for hassle-free future servicing. You can also view other pressure reducer for water and select what you need.
⚠ Never disable or ignore a faulty PRV—it’s your last defense against dangerous pressure buildup. Test regularly and replace as needed!


