How Do We Guarantee Quality from Raw Material to a Finished Valve?
You’ve specified a high-grade material for a critical valve. But how can you be sure the factory used that exact alloy, and not a cheaper look-alike?
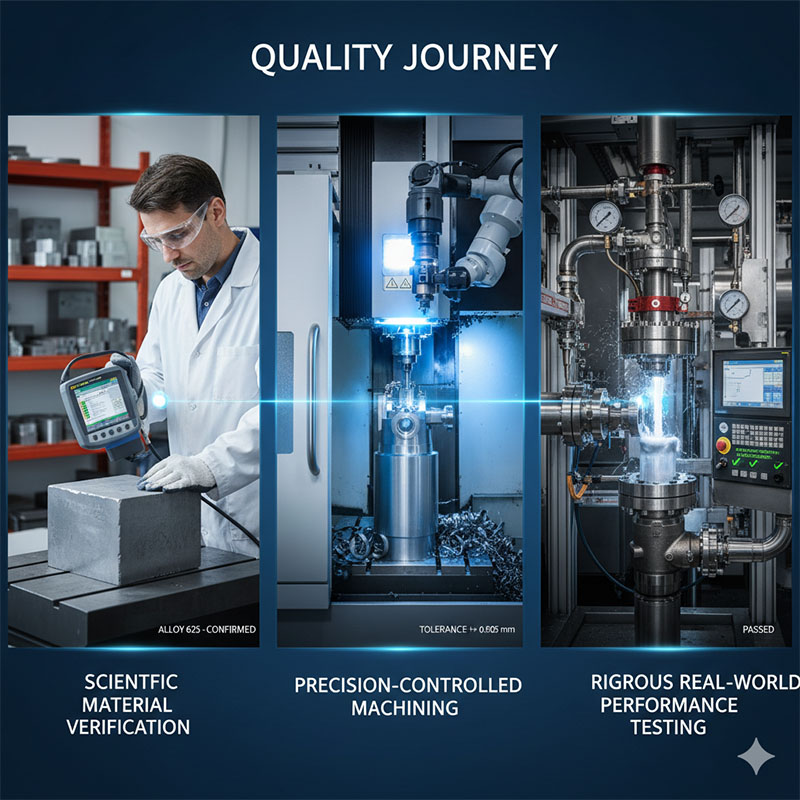
Our quality process is a transparent journey with three mandatory stages. We start with scientific material verification, move to precision-controlled machining, and finish with rigorous real-world performance testing.
I remember a conversation with an engineer who was terrified about product recalls. His previous supplier had shipped him a batch of fittings made from the wrong grade of stainless steel. The parts looked identical, but they started corroding in the field within six months, costing his company millions in damages and reputation. That story reinforces a core belief I have: trust is great, but data is better. You, as a designer, should never have to "hope" a part is correct. You should know. That’s why I want to walk you through our entire process, step-by-step, to show you how we build that certainty into every valve we make.
How Do We Ensure the Starting Material Is Flawless?
A certificate says the material is correct, but mistakes happen in supply chains. A single bar of the wrong alloy could compromise your entire product line, leading to failure.
We eliminate this risk by physically testing 100% of our raw materials. We use an XRF analyzer to verify the chemical makeup of every batch before it is ever used.

Every single bar of metal that enters our facility arrives with a paper certificate from the mill, called a Mill Test Report (MTR). Most places file this and start cutting. For us, this paper is just a claim. The real work begins when we use our handheld XRF (X-ray fluorescence) analyzer. Our technician takes this device and scans each batch of raw material. In seconds, the device displays the exact elemental composition of the alloy. It tells us if the 316L stainless steel bar has the correct percentages of chromium, nickel, and molybdenum. This non-negotiable step provides absolute certainty. It's the difference between assuming you have the right material and proving it with scientific data. For a designer like Jacky, this means the corrosion resistance and mechanical properties you designed for are exactly what you get.
The Foundation of Quality: Material Verification
-
### The Certificate (The Claim) The Mill Test Report (MTR) is our starting point. It provides the documented specifications from the material producer, but we treat it as an unverified claim until we test it ourselves.
-
### The Physical Test (The Proof) Our XRF analysis provides instant, on-the-spot verification. This data-driven step ensures that the material's chemical DNA matches your design-intent perfectly, eliminating any chance of a supply chain mix-up.
| Standard Approach | Our Verified Approach |
|---|---|
| Relies solely on MTR paperwork. | Uses MTR as a baseline, then verifies with XRF. |
| Risks using incorrect material. | Guarantees the correct material is used. |
| Assumes material integrity. | Proves material integrity with data. |
How Is Precision Built Into Every Cut?
You receive parts that are within tolerance but vary from the first to the last. This inconsistency creates problems for automated assembly and can affect the performance of your final product.
We achieve relentless consistency through a controlled machining process. It combines advanced CNC machining, constant in-process quality checks, and operators who are empowered to maintain the standard on every part.
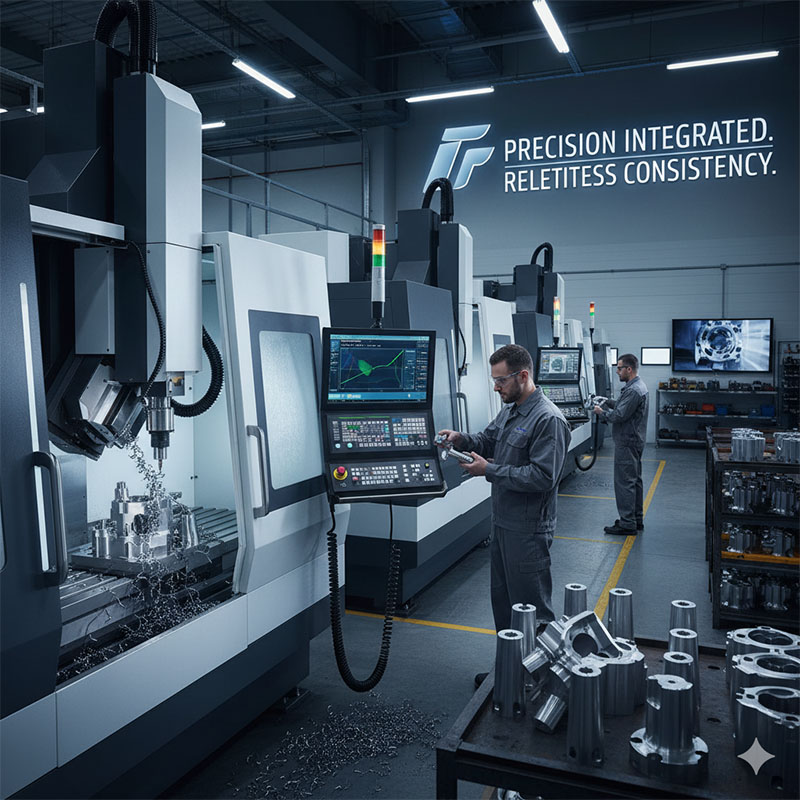
Once we have verified material, we begin the transformation into a valve component. The magic happens inside our CNC machining centers, but it's a very controlled magic. Before we run a full batch, we conduct a "First Article Inspection" (FAI). The operator machines one single part, which is then brought to our quality lab for a full dimensional analysis against your CAD model. Production does not continue until this first part is certified as 100% perfect. But we don't stop there. Our machine operators are our first line of quality defense. At regular intervals—for example, every 10th part—they perform in-process checks on critical dimensions right at their station. They are trained to spot any tiny deviation or trend, allowing them to make adjustments long before a part ever goes out of tolerance. This proactive approach ensures the 1,000th part is identical to the first.
From Raw Block to Precise Component
-
### First Article Inspection (FAI) This is our gatekeeper. It proves that the machine setup, tooling, and program are perfectly aligned to produce a part that matches your design before we commit to a full production run.
-
### In-Process Quality Control (IPQC) This is our continuous monitoring system. By having operators check parts throughout the run, we catch and correct any potential drift, ensuring stability and consistency from start to finish.
| Common Practice | Our Controlled Process |
|---|---|
| Inspects only at the end. | Inspects before, during, and after. |
| Risk of a large batch of bad parts. | Risk is limited to a few parts. |
| Operators just run the machine. | Operators own the quality of their work. |
Why Isn't the Part Finished After the Final Cut?
A part looks perfect and measures correctly, but it fails in the field. A tiny, unseen burr or piece of debris causes a seal to fail, leading to leaks.
A part is not finished until it is validated. Our process includes meticulous deburring, ultrasonic cleaning, and 100% pressure testing to ensure it performs flawlessly under real-world conditions.

After a valve body or fitting comes off the CNC machine, it may look finished, but its journey is far from over. The machining process inevitably leaves microscopic sharp edges called burrs. If even one of these is left in a sealing area, it can slice an O-ring during assembly, creating a hidden failure point. That’s why every part goes through a meticulous deburring process, often by hand under magnification. Next, the parts take a bath. They are submerged in a multi-stage ultrasonic cleaner, where high-frequency sound waves blast away any residual oils, coolants, and microscopic metal particles from every internal passage. Finally, and most critically for a valve, comes the proof of performance. We don’t just test a sample from the batch; we connect every single finished valve to a hydrostatic test rig. We fill it with fluid and pressurize it beyond its rated working pressure, holding it to ensure there are zero leaks.
The Final Steps to Guaranteed Performance
-
### Deburring and Cleaning This critical process removes all potential sources of contamination and seal damage, ensuring the part is not just dimensionally correct, but functionally perfect and surgically clean.
-
### 100% Functional Testing Every valve we produce is pressure tested. This provides documented proof that each unit is leak-free and can handle the pressures of your application, eliminating any guesswork.
| The "Looks Good" Finish | Our Validated Finish |
|---|---|
| Basic tumbling for deburring. | Meticulous-deburring, even by hand. |
| Simple solvent spray and wipe. | Multi-stage ultrasonic cleaning. |
| Spot-checks a sample for leaks. | Pressure tests 100% of finished valves. |
Conclusion
Our quality process is about building certainty. By verifying materials, controlling our machining, and validating every finished valve, we turn raw metal into a component you can completely trust.