How Do You Use a Self-Sealing Can Tap for a Safe & Effective A/C Recharge?
Your car's A/C is blowing warm air on a hot day. You bought a recharge kit, but you're worried about wasting expensive refrigerant or, worse, damaging your system.
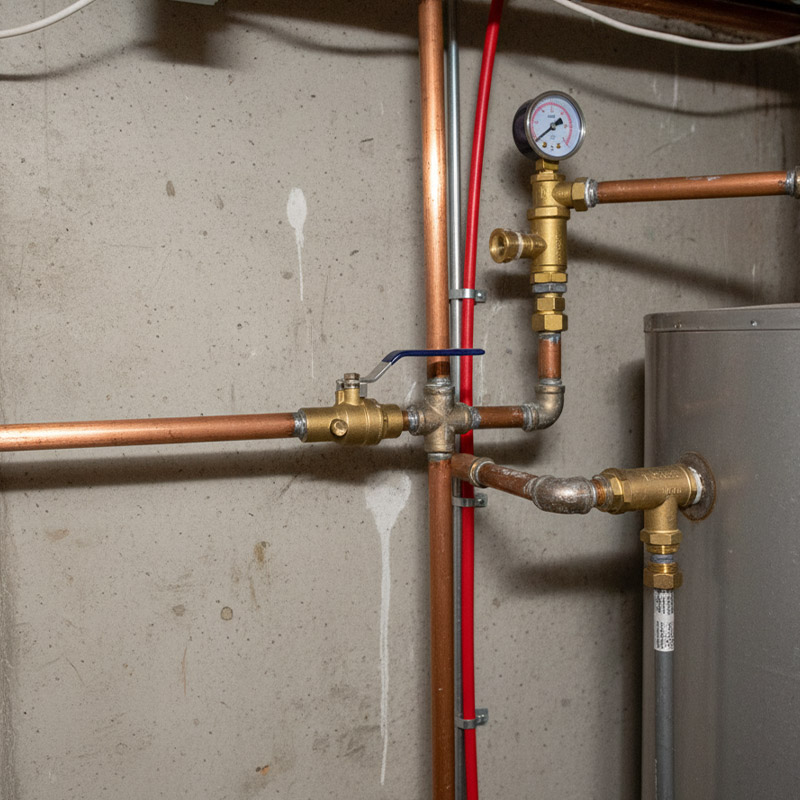
A self-sealing can tap is the key. To use it, you first retract the piercing pin by turning the handle counter-clockwise. Then, screw the tap onto the can until it's snug. Finally, after connecting your hose, you turn the handle clockwise to pierce the can.
Jacky, this little tool is a brilliant piece of product design. It addresses a specific failure point in the old system—leaks—and solves it with a simple, elegant mechanism. In our line of work, we call this "poka-yoke," or mistake-proofing. It's like designing a mold with guide pins that only allow it to close one way—the correct way. This tap is designed to prevent the common mistake of wasting refrigerant, making the process safer and more efficient for the user. It’s smart engineering in a small package.
Why Is a Self-Sealing Tap Better Than the Old Puncture-Style?
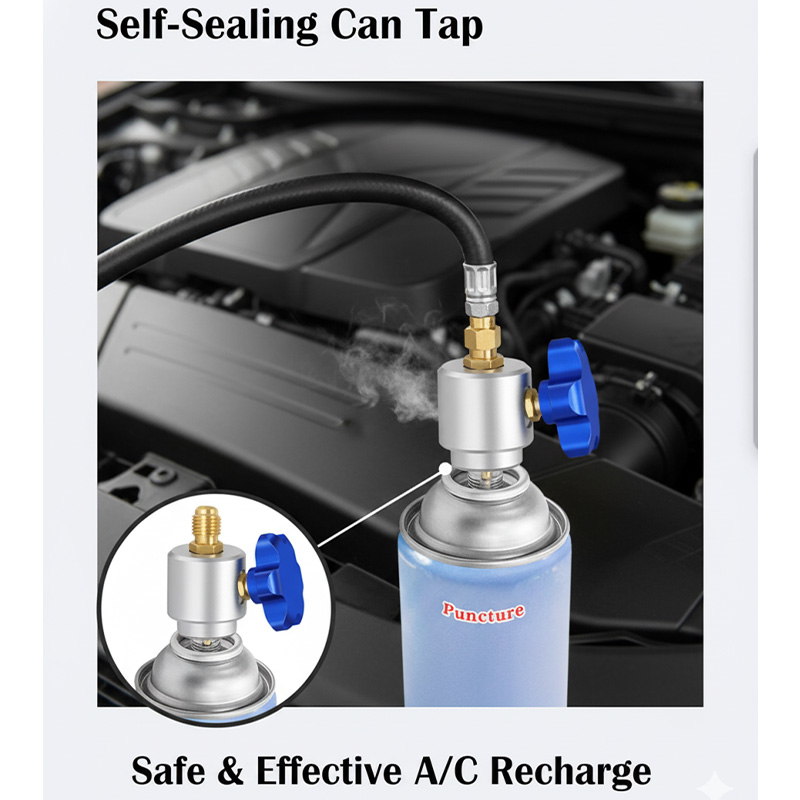
The old puncture-style taps were a one-shot deal. Once you pierced the can, you had to use it all or the rest would leak out, which is wasteful and terrible for the environment.
A self-sealing tap is far superior because it has an internal valve mechanism. It allows you to pierce the can, dispense the refrigerant, and then remove the tap while the can reseals itself, saving the remainder for later use.
This design change wasn't just for convenience; it was driven by regulations to protect the environment. Functionally, it’s a night-and-day difference. As a designer, you can appreciate when a new design makes the old one completely obsolete. Let's break down the advantages in a simple table:
| Feature | Old Puncture-Style Tap | New Self-Sealing Tap |
|---|---|---|
| Sealing | Punctures the can permanently. No seal after removing. | Internal valve reseals the can when the tap is removed. |
| Waste | Any unused refrigerant leaks out. High waste. | Saves unused refrigerant for future use. Zero waste. |
| Safety | Risk of refrigerant spray if removed before the can is empty. | Can be safely removed from a partially full can. |
| Compliance | No longer compliant with EPA regulations in the U.S. | Compliant with current EPA Section 608 regulations for small cans. |
This is a clear win for the user and the environment. It's a great example of how thoughtful design can lead to a safer, more economical, and more responsible product.
What Are the Key Parts of a Self-Sealing Can Tap and How Do They Work?
You're looking at the tap, and it seems simple. But if you don't understand how it works, you might use it incorrectly, leading to frustration when it fails to pierce the can.
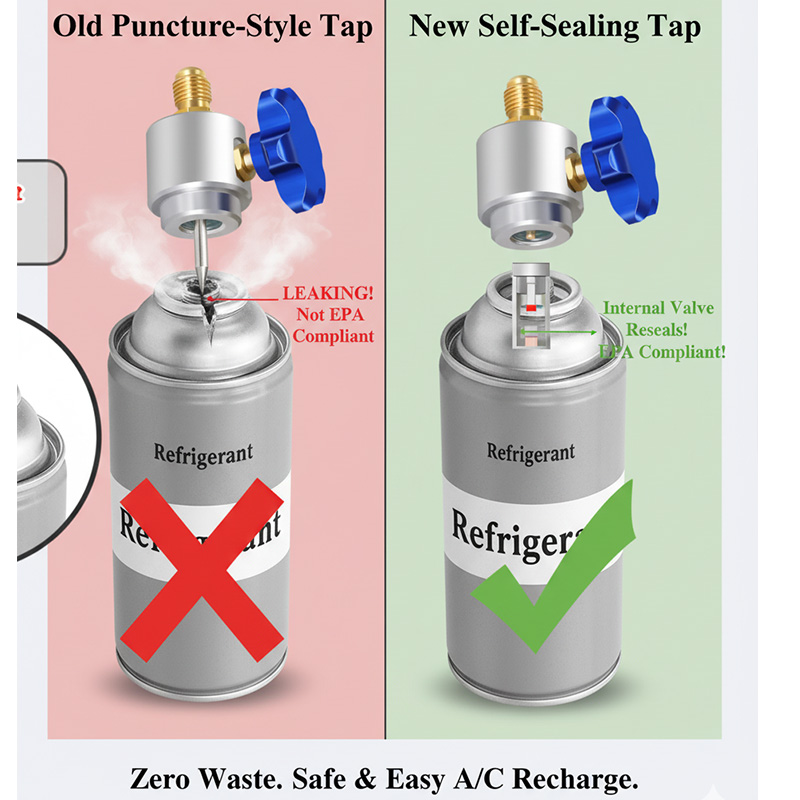
A self-sealing can tap has three main components: a threaded body that screws onto the can, a T-handle that controls a retractable piercing pin, and an outlet port for the charging hose. Turning the handle moves the pin up and down.
Understanding this tool is just like understanding a mold assembly, Jacky. You have to know what each part does to use the whole thing correctly. Let's look at the three key pieces of the puzzle:
1. The Main Body
This is the foundation of the tap. It's typically made of durable brass or aluminum and has internal threads that are specifically designed to screw onto the top of a modern self-sealing refrigerant can. Its job is to create the initial leak-proof seal with the can itself.
2. The T-Handle and Piercing Pin
This is the action part. The T-handle is connected to a threaded rod with a sharp pin at the end. When you turn the handle counter-clockwise, the pin retracts fully into the tap's body. When you turn it clockwise, the pin advances downward to pierce the can's internal seal. This mechanism gives you precise control over when the refrigerant is released.
3. The Outlet Port
This is a simple, threaded male fitting on the side of the tap. It's where you connect your charging hose, which will have a gauge and a connector for your car's A/C system. This port allows the refrigerant to flow from the can into the hose.
How Do You Connect and Use the Tap Step-by-Step?
You're standing by your car with the can and the tap, feeling a bit nervous. One wrong move and you could vent the whole can into the air or, worse, damage your A/C compressor.
To ensure a safe and successful recharge, just follow a specific sequence. Prepare the tap first, then connect everything, start the car, and only then do you pierce the can to start the flow.
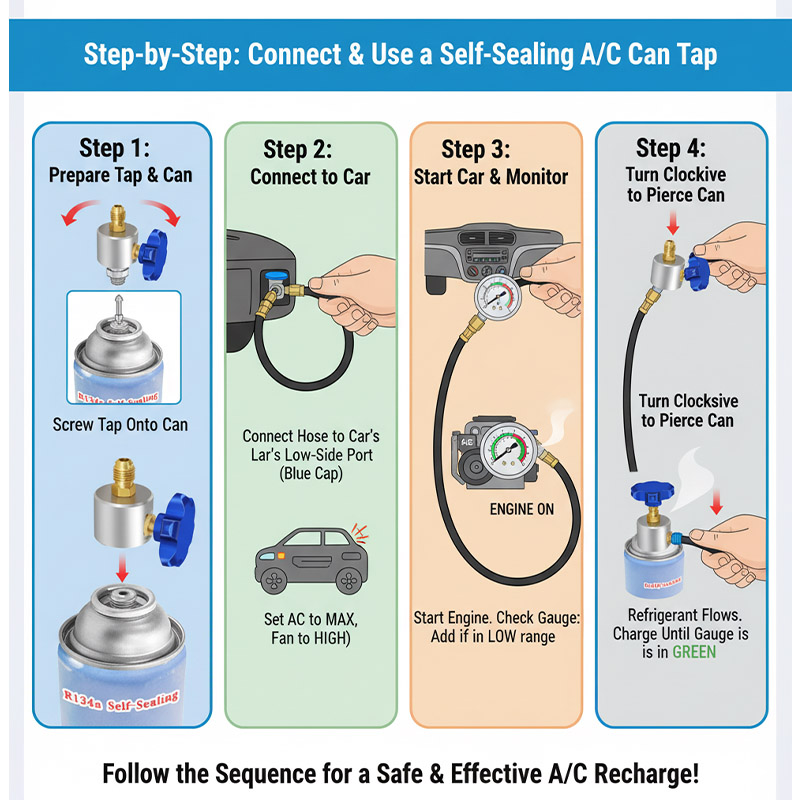
Doing things in the right order is everything in mechanical work. You wouldn’t tighten mold bolts in a random pattern; you follow a star pattern to ensure even pressure. The same discipline applies here. Follow these steps exactly for a perfect result.
- Safety First. Before you begin, put on safety glasses and gloves. Refrigerant can cause frostbite if it contacts your skin.
- Prepare the Tap. Turn the T-handle counter-clockwise until it stops. This retracts the piercing pin completely. This is the most important preparatory step.
- Connect to the Can. Screw the can tap onto the refrigerant can until it is snug. Do not overtighten.
- Connect the Hose. Attach your charging hose to the outlet port on the can tap. Then, locate your vehicle's LOW-PRESSURE A/C port (it will have a cap marked 'L') and connect the other end of the hose.
- Start the Engine. Start your car and turn the A/C on to its highest setting with the fan on max.
- Pierce and Charge. Slowly turn the T-handle on the can tap clockwise until the pin pierces the can and you see the pressure rise on your gauge. You can now charge the system according to your recharge kit's instructions.
What Are Common Mistakes to Avoid During an A/C Recharge?
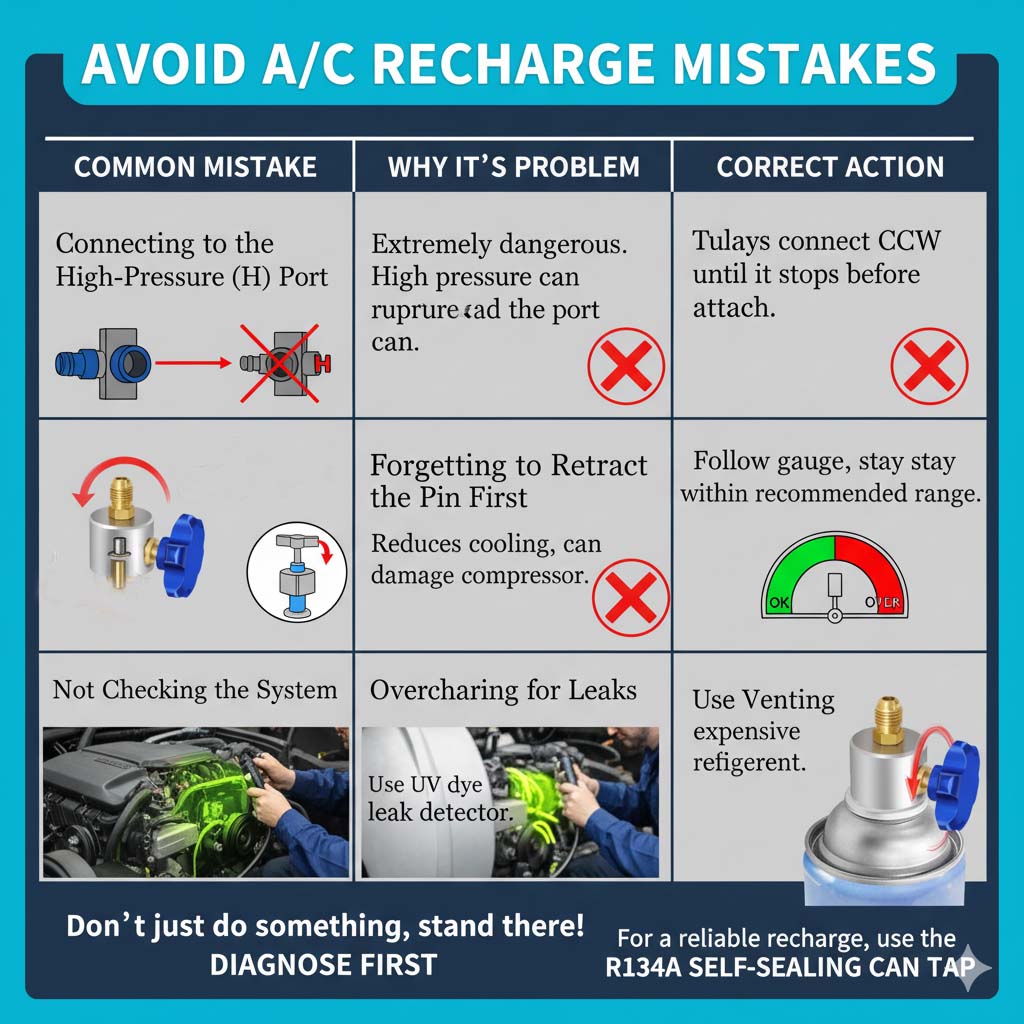
You've followed the steps, but your A/C is still not cold. You might have made a simple error that wasted your time and money, and you're back to where you started.
The most frequent mistakes are connecting to the wrong port, failing to retract the pin first, and overcharging the system. Avoiding these simple pitfalls is the key to a successful DIY recharge.
Conclusion
Using a self-sealing can tap correctly transforms a tricky A/C recharge into a safe, simple, and waste-free process, giving you the confidence to restore your car's A/C yourself.